Monday, June 22, 2009

Kodak 'Retires' Kodachrome


Some sad news today, after 74 years of production Kodak will be retiring their iconic Kodachrome film:
I'm not sure why it is that Kodak have chosen to end the film after 74.5 years thus missing a golden opportunity for a 75 year publicity of the bringing of colour film to the masses.
Surely delaying the announcement and having a 'Happy Birthday Kodachrome' year in which they could run competitions, have online galleries - a celebration of their achievements. They could have then deleted it at the end of the year letting the film go with a bang rather than just fading away in a very un-Kodachrome manner.
I feel its unfortunate that they have deleted it just six months short of the 75th birthday. I guess Kodak had to decide on whether there was going to be a new coating, stocks having dwindled in their supply chain and they now feel that they are going to concentrate on their newer technology films like Ektar 100.
Kodak have a tribute on their blog A Thousand Words
My Tribute will follow....

Tuesday, April 28, 2009

Early Colour Processes: Autochrome


In a previous post I have explored the early colour methods using RGB filters to make colour images.
In this post we'll be looking at the first commercially viable colour process- Autochrome.

Autochrome was the first generally available process for colour photography and was invented by the brothers Auguste and Louis Lumiere and was first commercially marketed in 1907.
The plates were made by mixing potato starch grains which were dyed three colours red/orange, green and blue violet. These were then coated onto a glass plate with the gaps filled by 'lamp black' a type of graphite, they were then sealed with a varnish after which a orthochromatic monochrome emulsion was added.

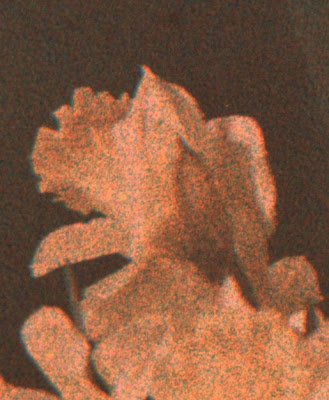
You can see from the image above the emulsion 'relief' on the reverse side of the plate. the following image shows the plate just held up to the sky.


The image is actually quite dense, when originally shot a slide like the one above shot indoors may have taken several miniutes to expose, even outdoor shots in sunlight may have taken a few seconds.
The colours are wonderful though, to think this slide is one hundred years old this technology must have been fantastic at the time.


Above is a close-up view of the grain structure which has been described by some as pointillist, but I quite like it- Autochomes certainly have a unique look!
The slide in this post was bought on ebay for a few pounds and is a lovely slice of photographic history. The original may have shifted slightly in colour or the orange-red look may have been characteristic of the slide at the time of development.
I have attempted to 'correct' the following image using the wonders of modern technology, not sure if I like it any better...


One thing is for sure Autochrome was a wonderful process.

Thursday, April 16, 2009

Phenix DN60


It isn't everyday that a new film camera is announced, so here is the latest in a dwindling breed.
The Phenix DN60 which boasts specifications of a mechanical shutter with a top shutter speed of 1/2000 sec and 1/125 flash sync and film speed of up to 3200 ISO.
It has the Nikon F mount so can use most Nikon lenses, it also has depth of field preview and what looks to be from the photo at least, fairly good construction with a metal top plate and lens mount all for £190.
I had never heard of Phenix but apparently they are the biggest manual camera maker in the Far East more detail here at their importers First Call Photographic

Saturday, March 28, 2009

Kodak Ektar 100


Kodak Ektar 100 according to Kodak: Featuring ISO 100 speed, high saturation and ultra-vivid color, EKTAR 100 offers the finest, smoothest grain of any color negative film available today.
Quite a boast, how does it achieve this speed/finest grain?
The answer is it borrows a technology from Kodaks Vision movie film stock called "2 electron sensitisation" This doesn't mean that it is just a re-packaged movie film far from it. Kodak has been working on the problems associated with the Vision line like poor keeping qualities and more efficient chemical scavengers in order to make the technology suitable for stills use.

What is 2 electron sensitisation?
Here is how the development team explain it:
"Here we describe a new concept for increasing the efficiency of photographic systems, two-electron sensitization, which makes use of the chemical potential stored in the oxidized dyes. In conventional photography, subsequent reactions of the oxidized dyes are not controlled and may in fact include counterproductive return electron transfer reactions (recombination). In the two-electron sensitization scheme, an appropriately designed electron donor molecule, X−Y, that is added to the photographic dispersion transfers an electron to the oxidized dye to give a radical cation, X−Y•+. The X−Y•+ then undergoes a fragmentation reaction to give a radical, X•, and a stable cation, Y+. The radical X• is chosen to be sufficiently reducing so that it can inject an electron into the silver halide conduction band. In this way, the oxidised dye, which is a strong oxidant, is replaced by the radical, X•, which is a strong reductant. The two-electron transfer scheme has the potential of doubling the photographic speed because two electrons are injected per absorbed photon. Photographic data demonstrate that increases in sensitivity by factors approaching 2 can be obtained.".

Phew! so what does that mean for your photography? Simply put the film should have finer grain and slightly higher sensitivity than films without the 2 electron method.

Photographic tests
The following four images were taken mid afternoon, the top chart is in part shadow the bottom is in almost full sun.
Four photographs were taken in quick succession, the meter reading was taken from a grey card placed in the centre and a Minolta spotmeter F was used to find the correct exposure.


The film was taken to a local chemist and put through their 1 hr Fuji minilab. If you want a larger image just left click the pictures.
As you can see each image has a white paper in it with the respective exposures N (meter setting 100ISO) +1 with the lens opened 1 stop, -1 lens stopped down from normal by 1 stop, and -2 which was stopped down 2 stops from the normal frame.

At first glance an impressive result, the spread between +1/-2 is quite acceptable for normal photography if you have a simple camera without meter or use sunny 16 'guess' exposure method this film should give you enough latitude.
Looking at both the negatives and minilab prints along with the scans it is noticeable that at the -2 setting the shadow detail is beginning to block up, if you look in the shadows of the vine under the top chart texture and detail is not as well defined as in the N frame.
At the other end of the scale the +1 frame looks very good so good that I wish I'd taken a +2 frame as well.
I have read many suggestions that this film should be rated at a lower speed than 100, in my experience that has not proved to be the case. I think it would be best to work at box speed initially and do your own tests with cameras and the conditions you use to find your own personal speed index.

Colours are quite saturated especially in the red and blue parts of the spectrum, but somehow seem to give good skin tones, quite a difficult thing for emulsion engineers to achieve or so I'm told.
The following image was taken on a very dull day in winter.


The above scene is the sort of thing Ektar excels at, giving nice 'punchy' colours without overcooking, the magenta bike is pretty accurate as is the shade of pink in the girls boots.

Grain is very fine especially for a colour negative, I have printed a couple of shots to 8x12 inches with no apparent grain, when I get the chance I'll try to print one larger optically to see how far the grain holds up.
The 2 electron sensitisation really gives fine grain, I'll bet we see it introduced into a few more films before too long- Ektar 400 and 1600 would be nice!
Here is a final shot of a garden landscape the colours are pretty accurate as this was taken on a bright cloudless day, the sunlight in the UK can be pretty yellow and the shadows long on sunny winter days.


I have now used 5 rolls of Ektar and can say Kodak have a winner on their hands here, since I started to write this they have announced that Ektar 100 will now be available in 120 format which personally I use much more than 35mm.
I think Kodak have shown with this film (and the updated T-Max) that they are committed to providing film users with high quality materials- film is not dead!

© Text and images Mark Antony Smith 2009

Friday, March 20, 2009

Filmwasters

Here is a link to a site called Filmwasters.com The site was formed by five like minded individuals. Here is a quote from their about us page:
"This site is dedicated to showcasing and promoting the creative side of film-based photography. It is a 100% independent operation designed, managed and financed by 5 friends and it is our likes, dislikes, enthusiasms, prejudices, limitations and energy that will inform its make-up"
It has a forum, a guest gallery and a podcast.
take a look.

Tuesday, March 03, 2009

Sad News: Franke and Heidecke file for insolvency

According to sources on the internet (though no statement appears on their website yet) Franke and Heidecke GmbH have filed for insolvency.
Founded in 1920 by Paul Francke and Reinhold Heidecke, they are famous for the production of the Rolleiflex camera which was introduced in 1928.
Recently the company has introduced (along with Sinar and Leaf) a digital medium format system called the Rolleiflex Hy6 which used their 6000 series lenses.
I have always enjoyed using Rollei cameras especially the Rolleiflex which is probably my favourite camera, and find it sad news indeed especially as the Rollei TLR has just celebrated its 80th birthday.
I guess film TLRs and a niche MF market along with the current financial crisis means the majority shareholders no longer feel they can pump the millions needed to keep Rollei alive (I think they have already put millions of Euro into the company infrastructure).
I wish the majority shareholder and the Rollei employees well and hope that the situation is resolved soon.

Friday, December 12, 2008

How it works: Kodachrome


The film structure

Kodachrome is a non substantive emulsion which basically means it has no built in colour couplers, it at time of exposure is effectively a monochrome film.
The following description is a simplified explanation of the emulsion structure, the actual engineering is slightly more complex.
The film basically consists of four separate coatings which are all monochrome.
The top coating (nearest the lens) is a blue sensitive emulsion, similar in spectral sensitivity to the types made around the turn of the last century in other words it is 'blind' to the green and red parts of the visible spectrum.
Under the blue sensitive coating is a yellow filter, which has a crucial role to play in the function of the emulsion.

The next layer is a blue/green sensitive coating, with a sensitivity rather like an othochromatic mono film, but because of the yellow filter above it in the stack only the green part of the spectrum is recorded.

The last layer is one with an extended red sensitivity, with a trough in the green part of the spectrum rising in the blue wavelength (which is again filtered)

Our Kodachrome film is a complex mix of different spectral sensitive materials and filters, that crucially must have similar photographic speeds or else the resulting images will have colour casts.

When the film is exposed the images are formed in the separate layers (effective RGB) but in order to give a colour positive image these need a special process that has to be both complex and accurate, in fact at time of writing there is only one such laboratory in the world, Dwayne's of Kansas USA and all Kodachrome whever shot in the world goes to this one Lab.

The Kodachrome Process
The following is a simplified version of the process, with some of the washes, intermediate baths and stabilisers omitted.
The first bath is an alkaline wash to convert the 'rem-jet' anti-halation backing into a water soluble form, which is then removed in the pre developer wash.
The first developer is a standard Phenidone hydroquinone B&W developer which gives a monochromatic negative image in each of the layers, after which the film is fogged by red light through the base (bottom of the stack) making the bottom red sensitive coating developable.
Next comes a cyan developer which fully develops the red layer the oxidised colour developer combines with a cyan coupler to form a positive cyan dye image.

The cyan developer bath of a Kodachrome processor

 The film is then exposed to a blue light (through the top of the stack) which because of the yellow filter only fogs the blue sensitive layer, the film now goes through a yellow developer which fully develops that emulsion and the oxidised developer and yellow couplers form a yellow dye image.
All that is left now is the green layer which being sandwiched between the integral yellow filter and the already developed red layer is hard to fog with light, so is chemically fogged in a reversal/magenta colour developer which forms a magenta dye image.
Next the yellow filter is then removed.
After the above has taken place all the silver has been fully developed so can be conventionally conditioned, bleached, fixed washed and dried in the normal manner.


© Text Mark Antony Smith

Thursday, December 04, 2008

Fuji Neopan 400


Fuji Neopan 400 is a film I've always liked, but somehow seems for me at least to have been a third choice after Tri-X and HP5.
Thats not to say it is inferior to either of those emulsions, far from it! Everytime I've put a roll through I've been impressed by its grain structure and tonal graduation.
I first used the emulsion in the 1980's and one of the things I noticed was the clear base and high accutance which are quite unusual for a fast film.
The characterisics of this film are fine grain for the speed, more so than HP5 or Tri-x and rated at EI 200 and given reduced development gives very fine grain and long tonal range (without the flat look other films can give)
Compared to HP5 the tones look a little harder and more defined against the smooth 'creamy' look of the Ilford emulsion. This gives a more modern look siuted to dynamic subjects in low light, saying that it's not bad with portraits either...


Leica M4-P, Elmar F2,8 Fuji Neopan 400 rated at 400 developed in Rodinal

Over the last few weeks I've been using it as my film of choice in my Medium format cameras, and in that format the film is hard to beat, and gives a really fine grain and nice tonal range with good shadow detail.

 The Artist Zacron, Rolleiflex T, Fuji Neopan 120 rated at 400 developed in Rodinal for 11 mins
Neopan is a very fine grained film for a 400 ISO, so much so that even with 35mm developed in Rodinal is quite satisfactory although you may prefer smaller formats in a developer like ID11/D76, in 120 grain and tone with Rodinal is wonderful.
I feel that this film has a unique look, kind of a 'steely sharpness' coupled with fine grain and at least in my country very reasonable price making it a bit of a photographic bargain.

© Text and Pictures Mark Antony Smith

Wednesday, November 19, 2008

"If cows didn't like mustard we couldn't go to the movies"

The above quote is from C.E.K Mees the great 20th Century film emulsion expert, a fascinating man (how many people have a crater on the moon named after them?). Apparently Dr. Mees noted that gelatin made from cows that ate hot tasting plants yielded better quality gelatin which gave the films a higher sensitivity.
Dr Mees wrote "The Theory of the Photographic Process" which I'm currently reading, you can read about him here: Kenneth Mees Wiki.
If you are interested you can make your own emulsions from advice here on APUG  
The articles are written by Ron Mowrey a photographic engineer who worked at Kodak for over 32 years.


Here are some emulsion noodles (mmm nooodles)

© Mark Antony Smith

Saturday, November 08, 2008

The Great War in Colour


Like most people my overriding image of the first war is black and white, a war fought in shades of grey. These pictures are shot on a early colour film called 'Autochrome' when I first saw the pictures of the French soldiers above I was amazed that they fought in beautiful light blue uniforms I'd previously imagined that they would be grey.


Building bridges in no mans land.


I love this image, just beautiful. I call it a centime for your thoughts.

Autochrome was the first commercial colour process, patented in 1906 by the brothers Auguste and Louis Lumière. The process was an ingenious one, using potato starch grains dyed different colours coated very thinly on a panchromatic mono emulsion here is the Wikipedia description of the material and its process.

Beautiful images of a very turbulent time in European history, this post is made on remembrance day 90 years after the end of the war in which these photo's were taken.
Spare a thought for the sacrifice made, by men and women from all sides.

Sunday, November 02, 2008

Found Film: ILFORD HP4


Ilford HP4 was introduced in 1965 as a replacement for their HP3 emulsion, although the two were available concurrently until 1969 when the earlier emulsion was phased out. HP4 was rated nominally at 400 ASA when processed in ID11 and 650 when developed in Microphen and was priced at 4/6 (23p). The emulsion was replaced in 1976 by HP5.
This film was given to me for processing by Phillip of Phillips cameras on Fye Bridge in Norwich, who has been the source of a few previous 'found film' posts.
Adox found film
Kodak Tri-x

I made the decision to process the film in Rodinal at 1:25 at 20c for 7 mins with 2 inversions per min agitation. No pre-wet was used and fixing was for 5 mins in Ilford fixer.
The film showed a fair amount of base fog which is normal, along with a mottled effect probably due to dampness.
There is only one image on the film:


Immediately after this shot is a large over-exposed frame, my guess is this was a camera test and after exposing the first frame the shutter 'stuck' and this roll was shoved in a draw for 30+ years until passed on to me.
Not a great find, but some of the info may be useful for others finding old rolls of HP4

Words and Images © Mark Antony Smith

Monday, October 20, 2008

Clumps and Chumps (or why film isn't binary)


There has been much talk on the internet about how many pixels it takes to out resolve film, the answer is 'it depends'
Many 'experts' have put their point of view across, some are disastrously wrong, certainly on a factual level.
here is one such assertion from Michael Reichmann:
Clumps and Chumps

"A very fine-grain film has grain particles that are about 2 microns in size. A typical DSLR has individual pixels that are about 6 microns in size. Ergo, film should outresolve digital. Right?
Not so fast! Here's the catch that many testers trip over. Grain particles are binary. An individual film grain can only be either black or not-black, on or off, exposed or not exposed. Sort of a binary device. A photo site (pixel), on the other hand, has a range of thousands of brightness levels, because it's an analog device. (Curious isn't it, that at this level film is binary and digital is analog?)
What this means is that it takes a clump of between 30-40 grains of film to represent a full tonal range, (similar in concept to the dithering done by inkjet printers to produce continious tones), while on a sensor each individual pixel can reproduce from hundreds to thousands of tonal levels."


Now for some facts.
Film emulsions are generally Ag/Br/I atoms combined into crystals from about 1 - 10 microns in size which are stacked in layers and dispersed randomly throughout the emulsion. They contain millions of atoms and many sensitivity specks which consist of sulfur and gold.
When film develops, it can form anywhere from 3 silver metal atoms minimum up to the entire grain, and grains can be stacked, and therefore the dynamic range of density is analogue in nature and virtually infinite. For practical purposes, it ranges from 0.1 - 3.0 density units in a normal negative B&W film.
Still need convincing?
Here's what's wrong with Michael Reichmanns essay.
Film grains are not binary, not even close they actually are made up of millions of silver particles that when looked at closely resemble a wire wool pad, the more photons of light that strike the grain the denser the filamentary structure becomes and the amount of light passed by that structure varies, the structure also develops randomly.

How Film Works:
Before exposure the structure of each grain consists of Ag+Br (silver bromide) atoms and sensitivity specs (sulphur and gold) the Ag atoms are positively charged (missing an electron) which is how they are bonded to the bromide atom.
When a photon of light strikes the silver atom they lose their positive charge and separate from the bromide atom, they are now silver ions and move (within the grain) towards the sulphur 'sensitivity' specks to form a filamentary structure, the more silver ions the denser the structure.
During development these structures are converted into metallic silver which is black, the bromide atoms are absorbed into the developer, fixing removes the silver atoms that weren't struck by any photons, leaving that part of the grain clear.
Here is an image (45,000x magnification) clearly showing the filaments and 'wire wool' like structure of the developed grain:


The image above pretty much nails the lie that film is binary or as Michael Reichmann put it:-
'An individual film grain can only be either black or not-black, on or off, exposed or not exposed'.

The film grain in the above picture shows that grain can be both black and clear at the same time as well as each filament differing in density, filamentary in varying degrees, letting different amounts of light pass though the grains themselves, being stacked up to 10 layers deep to give different tones.
Hardly the description of something that can have only 2 states, as would be the case if they were binary.

In his book 'The Fundamentals of Photography' C.E.K Mees states:
"Any silver deposit in the negative will let through a certain proportion of the light which falls upon it. A very light deposit may let through half the light, a dense deposit one-tenth, a very dense deposit one-hundredth or even
only one- thousandth".

I think Mr Reichmannn has made the common mistake of confusing the silver atoms that move towards the sensitivity specs with the grains themselves, coupled with not realizing that those grains are not opaque that and according to all the text books even the darkest grain will pass some light.
An easy mistake to make, I just wish his post was less 'pithy' especially considering his quite considerable errors, but I'll give him the benefit of the doubt and suggest a little research.
Here is a list of the books and references I have used for this article:

The Theory of the Photographic Process– C.E.K Mees and T.H James
The Fundamentals of Photography C.E.K Mees
The Science of Photography– H. Baines
Kodak Technical Document H1
Advice and help from Kodak research Europe (many thanks guys)

Information and help with writing this article Ron Mowrey

Here's a link to a paper by Nestor Rodriguez (Senior Technical Associate at Eastman Kodak):
Color 35mm film questions
Quote:
Q: What are the main differences between the way images are recorded on film and digital, aside from resolution?

A: "Film is analog, like the human eye. It sees and records continuous tonal gradations between black and white.


Edit: I have been asked to mention by a photographic engineer that the clumps and chumps article focuses on monochome film in order to make a more 'black and white' argument. It needs to be stressed colour film works in a similar way to mono initially but has a least three colour records, with the grains in each record being removed leaving a dye cloud which varies in size and density depending on the amount of photons that hit the parent grain. So in colour film grains (or rather dye clouds) vary in density (as in mono film) and also colour depending on the record they are contained in, not something that fits the 'on/off switch mentality of the 'clumps' argument.


Its difficult to argue from any perspective that the above (focussed on the cyan layer of a slide film) is or can be represented by a 0 or 1 value. Doubters should note the different densities, sizes and distribution of the dye clouds in a 3D stack.

Friday, October 10, 2008

Ctein Dye Transfer Print Sale


Above are two works for sale by Ctein one of the finest Dye Transfer print makers in the world, if you want to see high res versions please click on the images.
For those of you who don't know Ctein or his work here is an explanation:
Ctein who am ?
Dye transfer is a process that delivers the best colour fidelity and longevity of any material available today, the depth of colour and the range of colours it can display are unmatched by any other process, Cibachrome, pigment ink-jet and even silver Fiber based B&W can't match a DT for depth.
The big downside is that it is a very time consuming process, expensive and difficult, there are very few people who make DT prints worldwide and Ctein is one of the best, so an offer to own a high quality print from one of the best exponents of the art at an incredible price (I can't believe he is making anything on these) is something not to be passed up.

You can find out how to get your Ctein print on Mike Johnsons blog (The online Photographer)
Ctein print sale on the Online Photographer blog

The offer is for a limited time, and runs out on October the 19th, so get them while you can....
The offer has now ended, and was very successful Ctein will now be busy printing...
Images © Ctein text Mark Antony Smith

Monday, August 11, 2008

Pushing The Envelope

In a recent post I looked at Ilford Delta 3200, and was especially impressed with the emulsion in its 120 roll film format.
One of the biggest problems with pushing film is that the rule of thumb is the more you push the higher the contrast. Of course developer choice is critical but all films have their limits, especially if you need a long tonal scale or reasonable grain.
I've found that Ilford Delta has probably the best tonal range of any super fast film (over 1000 ISO) I've tried, so how far can I push it before picture quality is compromised?

Over the past months I've been using quite a bit of Delta, first off at 3200, and after being impressed by the tonal scale I've then progressively racked up the speed; these shots are rated at EI 12,800


These images were taken in pretty dark conditions, so much so I had little confidence and only shot one roll (oh ye of little faith)
Average shutter speeds were 1/15 wide open at F3,5 the film was then developed for 18 mins in Ilford Microphen a speed increasing developer.
Undeterred and impressed so far I decided to go all out to 25,000 EI, the following shot had the this lighting set-up.
A 15" laptop on the ebay.com homepage was paced on a table at waist level 1m (3ft) from the face, the room was totally dark. This should give you a rough idea how little light i had to play with.
My spotmeter reading from the lighter side of the face suggested 1/15 f3,5 (adjusting for EI 25,000 as my lightmeter only goes to 6400) so I decided to set 1/8 wide open to set the highlight on the face on zone VI.


Obviously an extreme case with little or no shadow detail, grain and contrast seem to have help up pretty well - all things considered.


The image above is of a 'rood screen' in a Norfolk church, although quite dull inside the church the window in the background and the detail in the screen are easily discernible something that is hard to do with extreme pushing which tends to increase contrast.
The film base had a much higher level of density (base fog) than normal with a slight blue tinge, but hardly surprising given the 25 min development time.
My conclusion about this film is that it is a wonderful tool to have in the film photographers camera bag, exposed and developed with care can give astonishing results.
The best quality will be obtained by using a speed increasing developer like DDX or Microphen.

© All images and text Mark Smith

Wednesday, July 16, 2008

Rolleinar Close up Lenses


When I sent in my Rolleiflex for its service to Brian Mickleboro, I had a chat to him about my use of the camera. I said my only criticism is that I'd like it to focus a little closer, Brian suggested I try a Rolleinar close up lens.
Brian explained-Rolleinars come in three versions 1 for head and shoulders, 2 for close crop of head shots and 3 which is for very close up subjects like flowers etc.
Here's what they look like on the camera:


Rolleinars normally come as a set of two the thinner being the taking lens, i say normally because earlier versions are 'three piece' with two identical diopters that are interchangeable and a wider parallax lens that can be paired with either of the thinner lenses.
The wider of the two lenses goes on the top (viewing) lens and it is important that the red spot faces upright for parallax correction:


Performance:
I know what you're thinking, putting extra glass in front of the lens is a bad idea for the quality minded photographer right?
Not with these little wonders it isn't.
So what of the performance? Well to sum it up these close up lenses work very well, surprisingly well would be an understatement.
Here is a close up of my daughter shot at 1/60 F5,6 on Adox CHS 50 ART (EFKE KB17) with a Rolleinar 1


The 100% crop


I'd say that for the money (I paid £10 for the Rolleinar 1) that every Rolleiflex/Cord owner should have one in their camera bag, the performance of the lenses is very good indeed and makes them a 'must have' accessory.

© All text and images Mark Antony Smith 2008

Monday, June 23, 2008

Rolleiflex T


The Rolleiflex T was originally designed to fit between the budget Rolleicord and the Rolleiflex F models.
The 'T' designation is understood to stand for Tessar as the camera is fitted with the cheaper 4 element lens often found on Rolleicords rather than the Zeiss Planar or Schneider Xenotar found on the 'F' models.
Some say the T really stands for (T)heodor after its designer Theodor Uhl whose sevices were apparently dispensed with after the bean counters at Rollei saw his handiwork.
That didn't stop the camera becoming a success with a production timeframe of 1958-76 and about 127,250 units being made.
My version of the camera comes in grey leather and judging by the serial number was produced in the early 1960's as a rule of thumb most grey cameras are early (pre 1966) a majority of T's are black.
A list of serial numbers can be found here
should you wish to date your Rollei.


The picture above shows the easiest way to tell the T model from a distance, it is the only Rollei with the shutter button on the side.
Even though the camera is positioned between the budget 'cord and the pro 'flex it certainly has more of the Flex's 'genes'
I've often seen people give the advice to get a Rolleicord over the T as the lenses are pretty much equal and the cords are cheaper, I'd advise that prospective purchasers should get a T as they are much better in daily use.
Below is one of the main reasons I prefer the T to my Rolleicord


The view above graphically illustrates how much brighter the T is compared to a similar aged Rolleicord, no doubt later Cords have better screens but I've always found them duller and slower to focus.
The Tessar lens is a design classic, less elements than the Planar and by some accounts not as sharp at the edges, but for the Portrait type work that TLR's excel it is a wonderful lens.


Both of the above images were taken within minutes of ripping open the box, they were taken on Neopan 400 with guessed exposures.
Edit:
I've had the camera and just love it if you are teetering on the brink of buying a Rollei just do it!
I recently saw this quote on a Photo forum:
"Get a Rollei. Life is to short to have spent it with photography without a Rollei".

©Text and Images Mark Antony Smith 2008

Cheap Photography (Nikkormat FT2)


Recently I chanced to come across a Nikorrmat FT2 for £25 .
The camera was made in the mid 1970's a time where mechanical cameras were the norm, most being assembled and tested by hand.
Looking at the camera it seems to have been hewn from on solid lump of steel, it has hard un-egonomic (by todays standards) edges that give it a very rugged purposeful look.
In the hands it feels very solid, and has the precision instrument feel of a very expensive hand made mechanical device, and feels remarkably comfortable in the hands.
The shutter sounds absolutely wonderful, noisier than a Leica (just) but has just about the most positive feeling release of any manual camera I've used. The design of the shutter is a Copal square with metal blades and speeds 1-1/1000 + B, flash sync is 1/125.
The speeds are located round the throat of the lens mount á la OM1 which takes a little getting used to if your previous camera had the speeds on the top plate.
The top plate has a minimalist feel without the speed dial. The control from right to left: wind-on lever (also switches on the meter) frame counter and stop down button.
To the left of the prism is a match needle meter which I'd imagine might be useful for macro work or street shooting.
Next to the meter is the serial number and the re-wind crank is in the normal position.

On very welcome feature of this model is the mirror lock up situated to the left of the lens mount, to the right is the mechanical self timer which seems to take around ten seconds, maybe slightly less.


Mounted on the camera is a 50mm F2 Nikkor H, which seems to slightly pre-date the camera but nonetheless is a very capable performer with very sharp good contrast, flare free images.

One problem with this model is that over time the meter seems to either become erratic or stop working, I'm told there is a resistor that needs cleaning or replacing.
The camera I purchased seems to have a non operational meter, which doesn't worry me as I'm used to using a spot meter with most of my film cameras.
Overall the camera is a joy to use, and as these cameras seem to be going for very little money this is a chance to buy something of real quality for pennies.
Like I stated in a previous post, if I could write a note to my younger self about to embark on the start of my photographic odyssey it would be get this camera, and a Rollei TLR.
finally a couple of pictures with the 50mm F2 H


Kodak gold 200

© Mark Antony Smith 2008

Tuesday, May 27, 2008

55mm F3,5 Micro Nikkor


If I could give a note of advice to my 14 year old self about to embark on buying my first camera, it would be buy a Nikkormat. The lens I'd pair it with would be the 55mm Micro Nikkor, sure the lens is slower than the average standard and a little larger than most but its versatility is pretty much unmatched.
At infinity the Micro Nikkor holds its own against any 50mm especially at apertures F5.6-11 but the amazing trick is the close focus, most 50mm lenses focus down to about 45-50cm the Nikkor seem to keep going and going right down to 24cm at which point it delivers a 0.5x magnification (it needs a extension tube to reach 1:1)
For me this makes the lens very useful, in fact it stays attached to the camera 80% of the time and has replaced the 50mm HC as my main lens which is no mean feat, it really is that good.
Another feature of the Macro is the deep set front element making it very flare resistant, no need for a lens hood here! 

Very nearly the perfect lens for most uses, its only limitation is the small maximum aperture which can also mean harder to focus under dull conditions and it also rules the optic out for low light work.
Above is an illustration of the length of the barrel at infinity and minimum focus.

Conclusion:
This lens is pretty much a must have for any Nikon manual focus user, if you have a camera that needs AI then the later 55mm F2,8 micro is just as good.
It can replace the standard 50mm F1.4-2 for pretty much everything but low light shooting, at infinity it's as good as my 50mm F2 H•C (and that's very good)
The ability to get down to half life size is something after using this lens for just a week that I can't do without.
I found this well used example for £40 at those  prices all I can say is– Get one!
Here is a shot at F5,6 at the close focus.

© Mark Antony Smith 2008

Monday, May 19, 2008

Film Is Not Dead....

I've stumbled on this site I'd like to share with anyone who hasn't seen it.
It called Film is not dead it just smells funny They have a good selection of analogue photographers and display some quite lovely work.
Here is what they say about their site.

"A place for photographers who are NOT using a digital camera.
With this web site we are trying to give analogue photographers a place to show their work to the world.
We do not hate digital photography , for our daily work we use it all the time.
But after using digital for a few years we are slowly going back to analogue.
There is more life in it, it’s more vibrant, not flat not “dead”. And the process of using film is so interesting, challenging and rewarding.
So let this be a showcase for photographers who think that “ Film is not dead it just smells funny"


I hope you enjoy their site, its good to know there's a few others out there who are gradually going back to film....
N.B
After a short time dead the link should now work the site seems to be called the International Analogue Photographic Society (Film is not dead it just smells funny)
Enjoy

Thursday, May 15, 2008

Developing your first B&W film


Developing your first film may seem a daunting task, but if you follow this simple 'how to' guide the mysteries of the photographic alchemy will soon be striped away.
Question one: What equipment do I need?

Well actually surprisingly little, here is a list with essential items in Italics:

A daylight developing tank with spiral
A thermometer
A liquid measure (1 litre)
Developer
Fixer
A child's medicine syringe (5-10ml)
Stop bath
Wetting Agent
Film weights
Dark Changing Bag

Rap on Equipment Choice
There are many types of developing tank, some prefer steel, some plastic, I'll give you the name of the one I use: – Patterson
I think they make a good product with easy to load spirals, I would recommend buying a tank that holds a 120 rollfilm as even if you don't own a MF camera you can process two 35mm in one go.

Rap on Developer Choice
Just about everyone has their favourite 'brew' but I recommend until you get on your feet a simple just add water, use and discard (one shot) developer, good starter developers include:

Agfa Rodinal
Ilford Ilfosol S
Patterson Aculux

These developers come as liquids ready for dilution and use, once you have developed your film they are disposed of.
This type of developer is in my opinion the easiest for the first timer, as it is a mix it use and dispose.
It will also be helpful to start with the manufactures time and agitation, if you can't find a time for your developer/film combo try the Massive Dev Chart

Tightwad alert
You'll notice above that some items are considered essential (italicised) and others are actually not considered needed to get you there.
Stop bath, although desirable can be substituted with water, wetting agent with normal washing up liquid, weights with wooden clothes pegs, and the dark bag can be dispensed with by using a cupboard or wardrobe at night with the lights out. My first film was loaded in the cupboard under the stairs, with a coat placed at the bottom of the door to cut out the light.

I have all the stuff, what do I do with it?
First do a dry run, practice loading a blank film firstly in daylight, then in your dark area – is advisable to sit in your dark area for 5 mins before loading as it must be completely dark! Your eyes should not see anything, not even your hand in front of your face!

Tip: During re-wind try to leave out your film leader so you can cut off the tongue (save it for tip2) then feed the first 4 inches or so into the reel in daylight-see image below:


Once you feel confident you can load your film into your tank in total darkness. After the film has been loaded the rest of the process is in the light:- Yeah

Prepare your chemicals according to the instructions, use the thermometer to make sure the developer is at the correct temperature normally 20°c, (68F) stop bath and fixer should be approximately the same temperature as the developer.

Pour in the developer slowly making a note of the time (a second hand on a watch is good for this), initial agitation is normally continuous 30 seconds or so depending on developer, then give the tank three sharp taps on your work surface.
It is good practice to keep a tally of the time passed, and remember to keep the agitation consistent and not too vigorous as consistency is key in the world of processing.
Once you have nearly finished development get ready to pour out the chemical about 15 seconds before the final developer time, and pour out slowly.
Next step is to pour in the stop bath, or if you're like me plain water as I only use stop bath if the dev time is less than 5 mins.
After rinse/stop pour out carefully and now pour in the fixer.
Fixing time for most films in fresh solution is quite short say 2-3 mins T-Max type films need a little longer and come out pinkish if under fixed.
Tip2:
If you use 35mm film use the tongue that you cut off prior to loading the film, put it in a small beaker of fix, take the time it takes to clear and double it, that will give you a total fixing time for your film.
Once you have fixed your film pour the liquid back into the container and leave the tank under running water for at least 10 mins, if possible empty the water and agitate to help wash the film.
After washing is complete put in your Photo-flow (normally just a few drops)- if you are really cheap a drop of washing up liquid. This will give you film a nice finish and help avoid 'run marks' during the drying process.Remove your film from the tank carefully and hang it somewhere to dry, a shower is a good place I clip my films with a clothes peg top and bottom so they dry nice and straight.
That's it! you're done, just be sure to cut your films and sleeve them in archival sleeving and store them safely and they should last many years.

© Mark Antony Smith 2008